Failures & F*ck-ups...
…are what we specialize in! I think that’s going to be our new motto. Learning to do something well requires about 95% failure for 5% success. Good thing I’m so dang good at effing-up! There’s no better way to find out what works best than to find all the ways that don’t work. Let’s all just be glad I do pub furnishings and not brain surgery. Along with building up our workshop and equipment, the past year has been spent on making and testing prototype after prototype. Our goal has been to create the best quality pieces while keeping them as affordable as possible. Accomplishing this while making the business viable (as in, we actually make a living at it) has been a lot tougher than you would imagine.
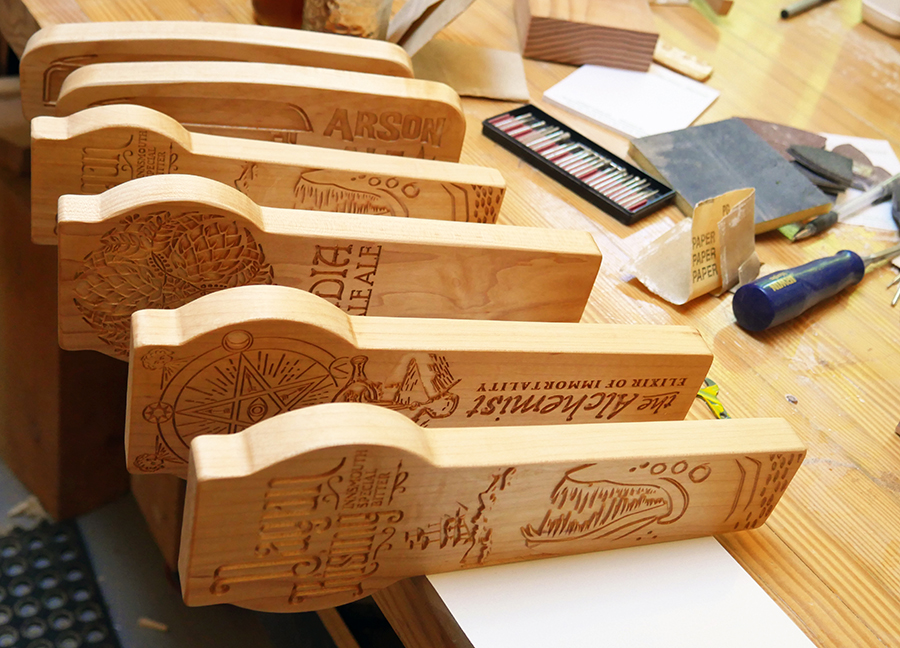
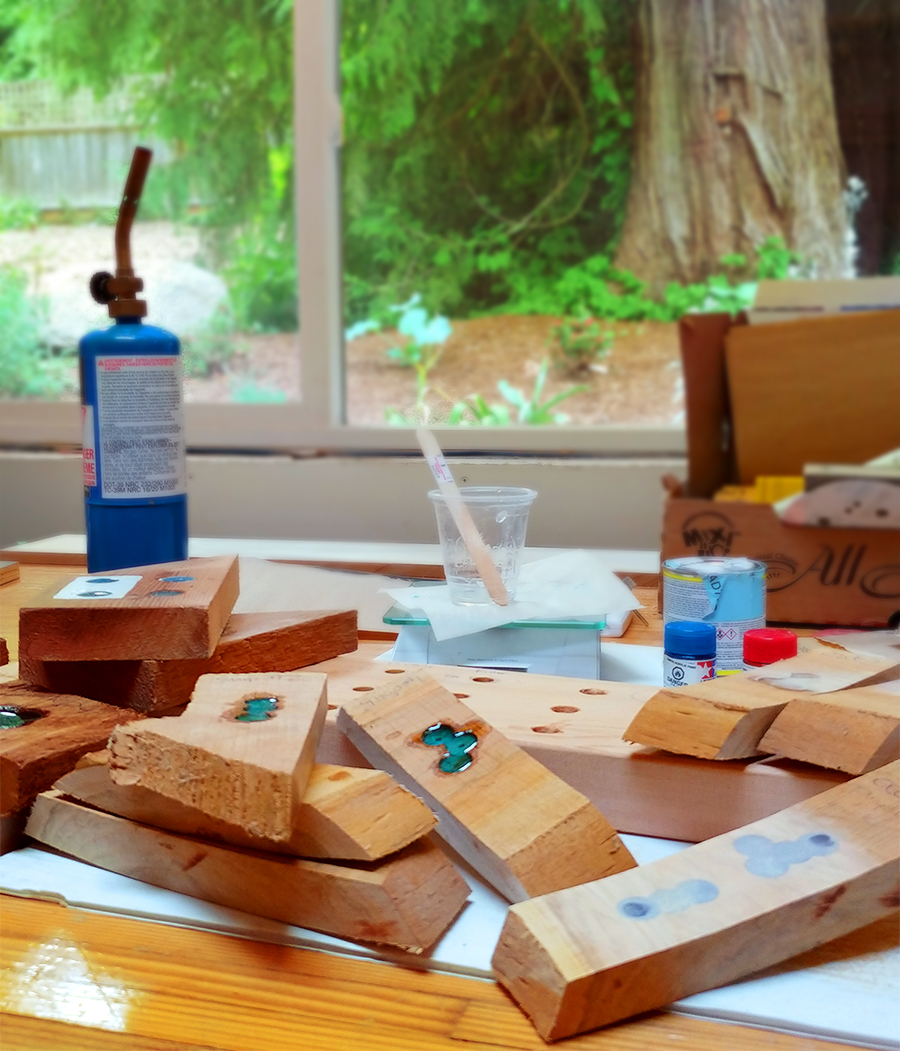
I’ve made dozens of the test pieces you see in the photo. Testing everything from materials - the chemistry of combining various epoxies, dyes and finishes, wood types, tap inserts; the process - curing the epoxy, repairing epoxy bubbles and wood flaws; designs - tap size and shape, redesigning graphics; to optimizing all the tools and equipment - jigs, cnc tools and cutting paths, vacuum chambers and epoxy heaters etc.
big breath The list seems endless but I think we’re finally….maybe….about 95% the way there. The next 5% should be awesome! Here are a few tips we’ve learned along the way:
WORKING WITH EPOXY - TIPS FOR BEST RESULTS
If you’re interesting in experimenting with epoxy pours yourself, here are a few tips we’ve figured out along the way. Hopefully these will save you a bit of time:
.
-
Warm the room to around 23˚ c
-
Be sure your epoxy is stored in a warm place. You may even want to warm it in a warm water bath (not hot!) before using.
-
Use either graduated cups or a kitchen scale when pouring both parts to be sure the amounts are correct.
-
Stir gently to prevent beating in any air.
-
Use two cups for the mix - stir the first time in one, then transfer to the second cup and use a fresh stick for the second stir. This will ensure the mix is fully blended.
-
There are several dyes available to tint epoxy. Transparent dyes give the best effect. We’ve had a lot of luck with Tamiya acrylic clear paints.
-
If you are pouring onto wood, you may wish to slightly heat the wood first. I find the warming setting in the oven works well. This helps to reduce bubbles. When you pour onto cool wood, the warming epoxy will cause the air in the wood to off-gas, creating more bubbles. Warming the wood first reduces this effect.
-
Try not to pour thicker than 1/8 inch layers
-
If pouring a large surface, mix and pour as quickly as possible. Larger quantities will kick off the curing reaction faster as the heat rises faster. If you pour too slowly, you will notice a wavy or bumpy “orange-peel” effect on the surface.
-
If you have micro-bubbles or cloudiness to the finish, either your room or your epoxy is too cold.
-
Of all the methods to remove bubbles, using a propane torch gently and quickly passing over the surface seems to work best. However use caution as overheating the epoxy, or the wood that it is poured into, can ruin the piece. Don’t aim the flame directly on the epoxy.
-
Check the surface again after 20 minutes or so and torch again if needed.
TO SAND OR NOT TO SAND?
 In my opinion, you’ll get the best results by making a perfect pour then leaving it unsanded. That’s how your get that beautiful, liquid-pour, glassy surface. However, this can be incredibly tricky and time consuming, especially on detailed carvings with multi colours and can require careful syringe work. A great time saver is sanding after the epoxy cures. It means that you can just pour the epoxy without as much time and care, not worrying about spill-over as you will be sanding the piece down after. It is a slight compromise on the finished look, but it’s worth it if you are concerned about saving time. If you sand the surface well, down to a fine grit, then apply finish, the end result is still beautiful!
A drawback to sanding means that bubbles are exposed on the surface as holes in the epoxy. If you follow the above hints, you should end up with a hole free surface. However, holes may still appear.
The best way to deal with them is to scrub them out with water and a fine nail brush to remove sanding debris, (no soap) let it dry, then mix a tiny bit of clear epoxy into the holes. Wait for it to cure then sand again. Also, be sure you have allowed enough cure time before sanding. Feel free to email us with questions or suggestions!